
Is the hotshoe on your Speedlite loose? If so, you're probably experiencing all sorts of communication issues between your flash and camera. The Canon 580EX II featured in this repair developed a loose foot over several years of abuse use. The hotshoe wiggle produced chronic E-TTL flash overexposure and a never ending battle to access the flash's Custom Functions through the 7D's menu system.
Luckily, tightening the hotshoe of the Canon 580EX II is a relatively simple repair process. You need a #00 Phillips screwdriver, a pair of tweezers, and patience. That's it! There are only 8 screws to remove and 4 to 6 more to tighten.
Photos and instructions of the repair process are after the time-lapse:
Before starting the repair, please keep in mind that this post is to be used only as a guide. You will be working near electrical wires, so there is a chance of electric shock. Also, several parts you will be handling are extremely small and easy to lose. Please read through the steps and watch the time-lapse before beginning the repair. As you take the Speedlite apart, take note of the orientation of the items such as the metal foot, the locking ring, and the quick-release button.
You may now proceed at your own risk!
Tools Needed: #00 Phillips screwdriver and tweezers. I used the tools from my OWC tool kit I received with a 500GB hard drive I ordered last year. OSH or Home Depot probably sell the #00 Phillips screwdriver as well.
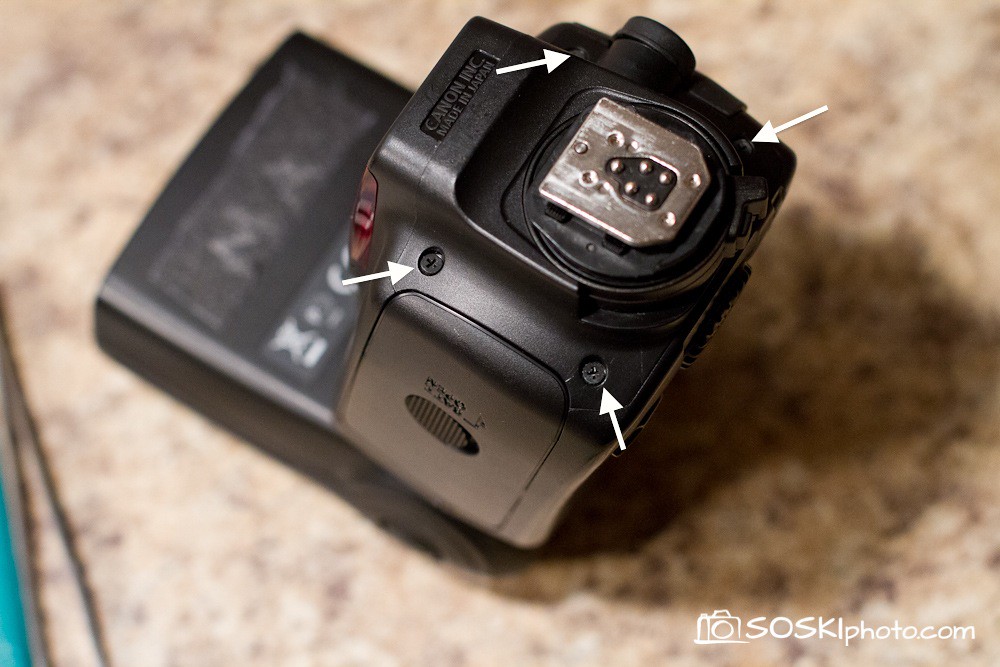
Step 1: Remove batteries.
Step 2: Remove the weather seal surrounding the flash's foot. Fun Fact: this rubber seal can also fit on Canon's 430EX II hotshoe.
Step 3: Remove the 4 screws along the bottom of the flash. Once these are removed the bottom assembly will come apart with little hassle. Don't pull too hard as the thin wires connecting the foot will be exposed.
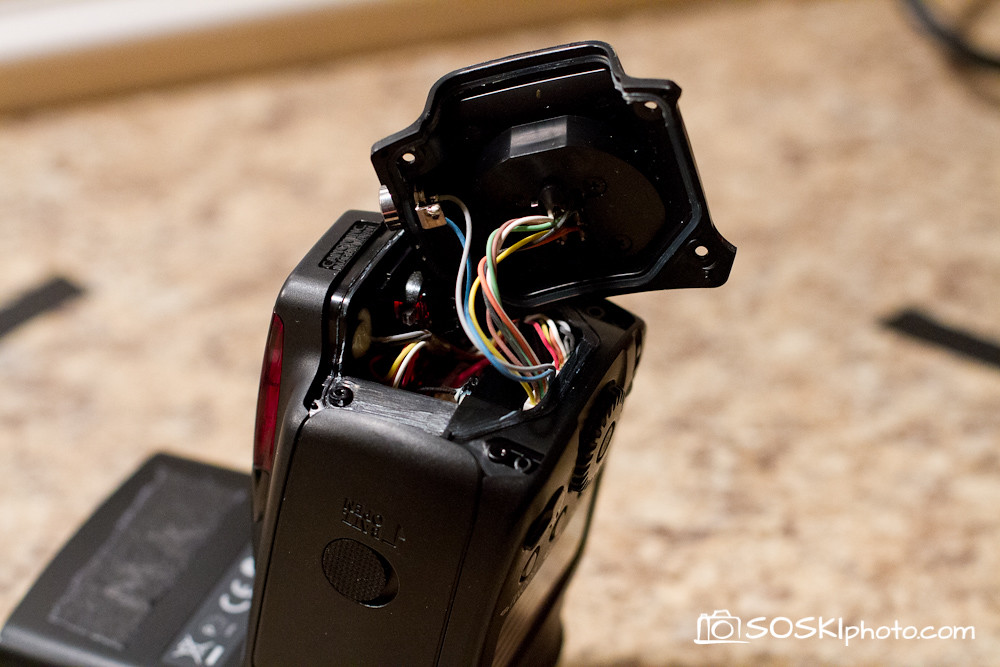
Step 4: Remove 4 more screws on the lower foot assembly. These screws hold a cover over the main electrical contacts of the foot.
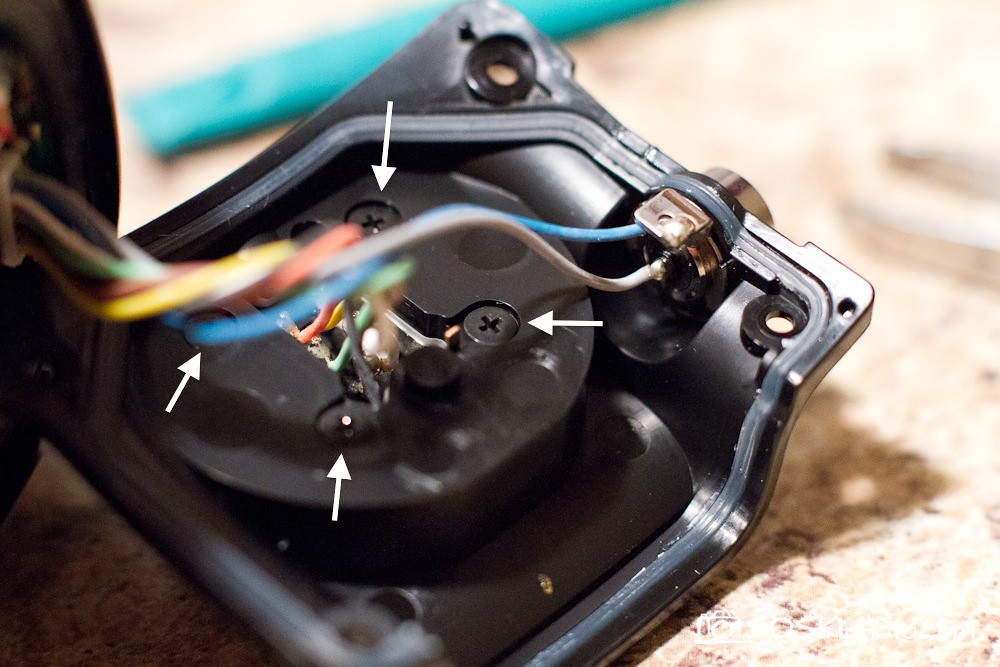
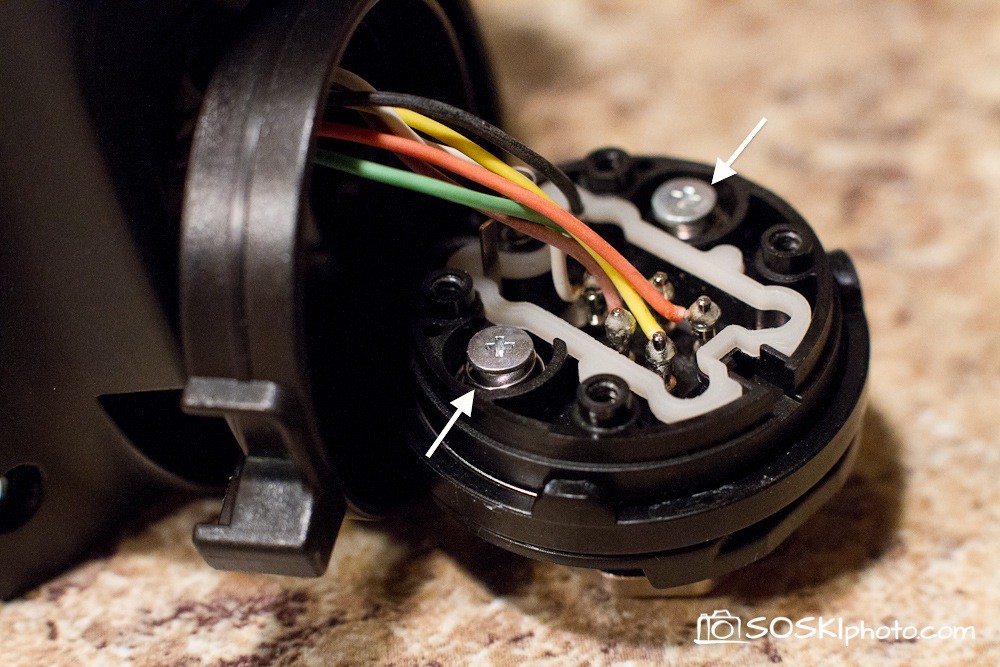
Step 5: Be particularly careful in this area. The soldered wire ends may be fragile and easy to break. Tighten the 4 screws indicated by the arrows below. These screws hold the metal foot of the flash. If your hotshoe wiggles, there's a good chance these screws will be loose. Tighten them just beyond snug. Do not over tighten!
Step 6: These two bulkier spring-loaded screws control the firmness of the hotshoe locking mechanism. You can check to see if these are loose. Snug as needed.
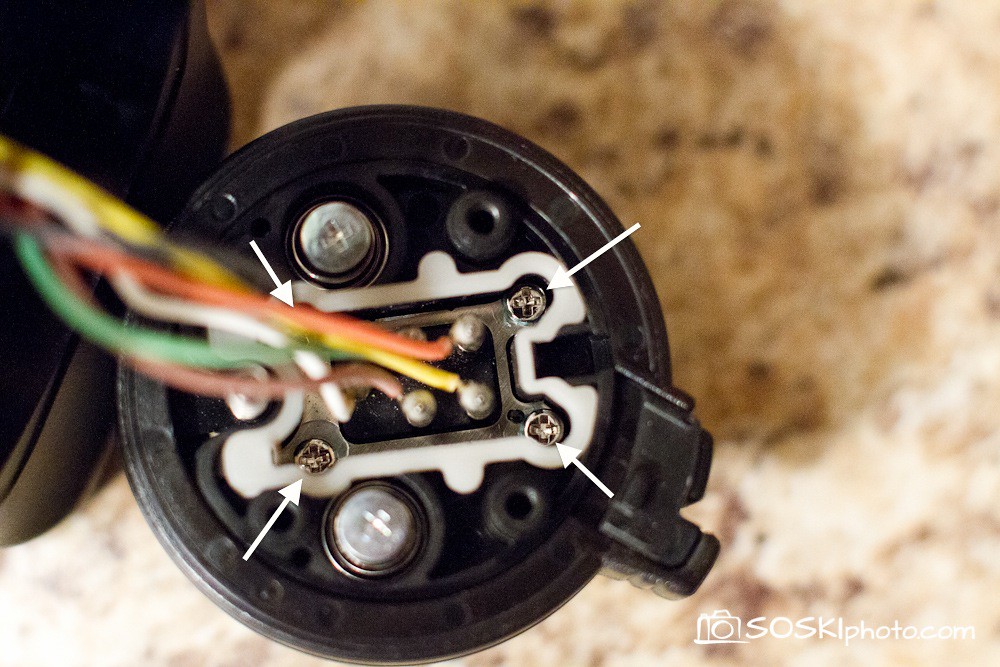
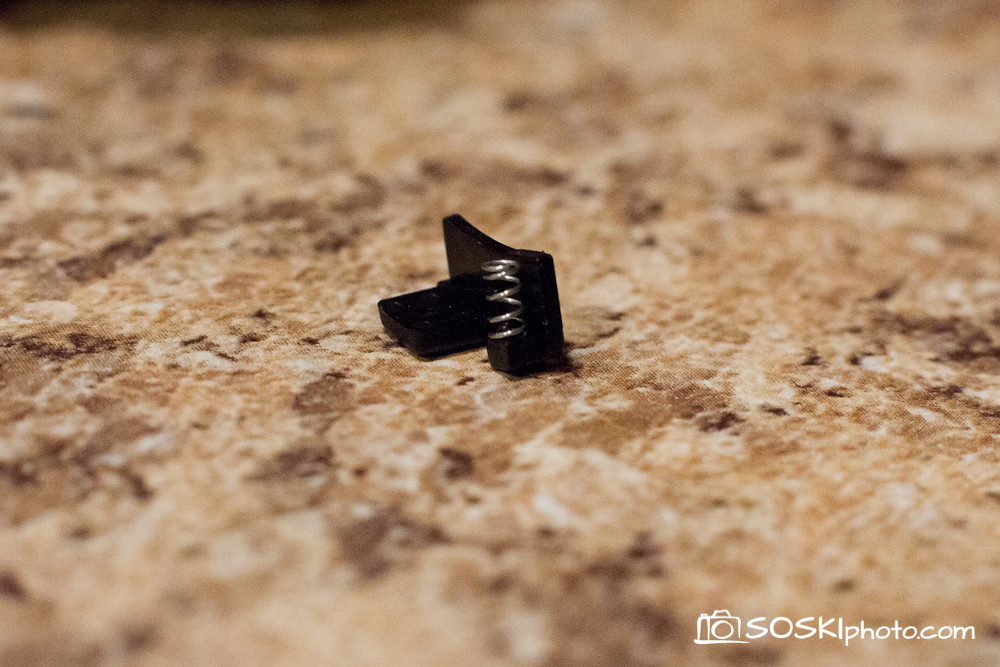
Step 7: There is a good chance this part dropped off after removing the cover in Step 4. This two piece (plastic part and spring) are the quick-release locking button. Be careful as the spring is tiny and will come loose. The button can only go in one way, but it may take you a while to get it seated properly. It took me three tries before it reinstalled correctly. Using tweezers helped me seat the spring correctly. Remember I told you needed three things for this repair? Yeah, you need patience.
Step 8: Reinstall all of the parts removed by reversing the steps. It may take a few times getting everything oriented the correct way and seated properly. It took me three attempts before I successfully had everything positioned properly. The spring in the quick-release button gave me the most trouble. The button only installs one way, so you will eventually get it seated correctly. Also, keep in mind that the rounded edges of the metal foot face towards the rear of the Speedlite.
That's it! Hopefully you didn't drop any screws on the floor or misplace that pesky spring. Check the functionality of your flash and ensure its working properly. The tightened foot should fix your overexposure and communication issues. If it did, you just saved a few bucks by not taking the flash in for repair. If the repair didn't solve your problems, you should probably send the flash to Canon for repair.
***Update November 19, 2012***
You can now view the Canon 580EX II Service Manual here – http://bit.ly/SK9qtl. You can also order most genuine service parts from US Camera in Colorado – http://www.uscamera.com
Small bits of content which are explained in details, helps me understand the topic, thank you!
ReplyDeleteFast watch battery replacement service
I'm glad you found it helpful, Sarah. Thank you for the feedback.
DeleteNice work Stan. Very detailed explanation. Although might I suggest making a video tutorial? It would be more visual that way, we are dealing with expensive stuff afterall.
ReplyDeleteThanks for the feedback. I considered video but thought the stills would be more useful if someone was following this repair at home. The time lapse was a fun way to watch an hour repair sped up to two minutes.
DeleteMaybe I will make a video for the next How To.
Where do I get the spring in step 7. Is it available online anywhere ?
ReplyDeleteAccording to the Canon 580EX II Service Manual, you can't request the spring individually, you have to order a whole Foot Assembly (Part # CY2-4220). You can order most genuine service parts on US Camera in Colorado – http://www.uscamera.com/cy2-4220.htm
DeleteYou can also view the Canon 580EX II Service Manual here – http://bit.ly/SK9qtl
Thank you so much for your time and effort in creating this help guide, i shall be attempting this in a minute.. :)
ReplyDeletewish me luck
All done and took 10 minutes... The flash is now lovely and firm, it was really wobbly and used to flash whenever it wanted to.... I so should have done this a year or so ago!!
DeleteThank you once again
Thank you very much! All was super helpful! Esp the part about the spring! I thought I will hang myself - didn't have an idea where it had fallen from.
ReplyDeleteGreat blog I enjoyed rreading
ReplyDelete